How to Review Technical Drawings With Your Playground Supplier
Reviewing technical drawings is the step where your indoor playground project is won or lost. A checklist you can repeat makes that step easier to handle: prepare your requirements, check accuracy, verify compliance, confirm site details, document feedback, and approve the final set. You can use this checklist with any commercial playground equipment manufacturer. It keeps every conversation focused on the same facts.
Treat the design & safety review as a team effort, not a test. Your supplier wants a plan that can be built as much as you do. Send written feedback early, tied to drawing numbers, and you protect both the budget and the safety of the finished play space. Small questions asked now cost far less than change orders later.
Key Takeaways
- Get your site data and standards ready before drawings begin. This helps you avoid expensive changes.
- Compare the dimensions, labels, and materials with the equipment list to make sure they are correct.
- Check safety certificates and accessibility features to keep children safe and meet the rules.
- Check the site details and warranty terms for each part to avoid problems later.
- Write down your feedback clearly, and approve only when all documents meet your requirements.

Step 1: Get Ready With Your Commercial Playground Equipment Manufacturer
Collect Requirements and Site Data
Good drawings begin with good information. Before any drawings arrive, gather a measured floor plan, usable ceiling height, column positions, entrances and exits, target age group, attraction mix, theme references, budget, and opening schedule. These details are the base for every decision you make later. A commercial playground equipment manufacturer can only place equipment in the right spot when your site data is complete.
Ask your supplier for CAD blocks, Revit families, and specification sheets. Your design team can then add equipment to the site plan and test the fit early. Vasia Play‘s turnkey process starts with floor-plan analysis and 2D CAD layouts. That gives you a clear checkpoint before engineering drawings are issued. You review the layout for your own space while changes are still cheap.
Know the Standards That Apply
Confirm the standards for your destination market before design work starts. ASTM and EN1176 both set spacing and structural rules for commercial playground equipment. Indoor venues also need local fire-exit rules and impact-protection measures. Write these requirements into your brief so the supplier designs to them from day one.
Put your requirements in writing and ask the manufacturer to confirm each one on the drawings. A commercial playground equipment manufacturer that works internationally should know which rules apply where. Vasia Play states ASTM and EN1176 compliance and TUV certification since 2008. Ask for current documents for your project and jurisdiction. Build safety and compliance checks into your playground layout and design review from the first sketch. One computer-aided design (cad) drawing review at this stage saves rework later.
Step 2: Check Commercial Playground Equipment Drawings for Accuracy
Verify Dimensions, Labels, and Equipment Lists
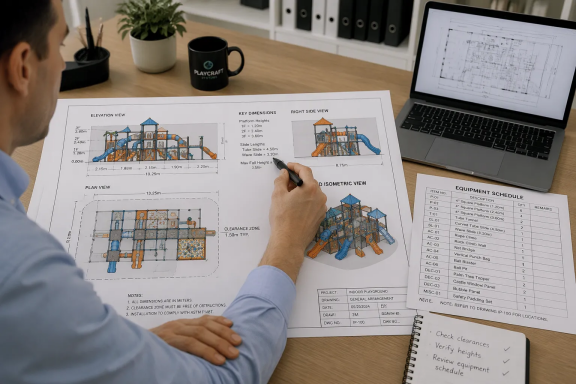
Begin by comparing three things side by side. Line up the itemized equipment schedule, the drawings, and the commercial scope. Price differences often come from scope differences, not from quality or supplier margin. You can only judge a price gap after you confirm that every document lists the same items.
Go through the drawing set with a marker in your hand. Check platform heights, slide lengths, clearance zones, equipment quantities, part labels, and material callouts. Each part label on the drawing should match a line in the schedule. A missing label turns into a missing part on site. Make sure every clearance zone fits inside your measured floor plan, and check that the scaled drawing matches your site dimensions.
Vasia Play’s commercial indoor playground equipment is custom and modular. Exact dimensions, capacity, and floor plans must come from approved drawings, not from catalog images. Catalog photos show a concept, and your approved set shows what you will actually receive. A smaller equipment catalog can be enough, too. More options do not automatically mean a better commercial playground equipment manufacturer. What matters is whether the supplier can document the configuration you ordered.
Confirm Materials and Surfacing Specs
Read every material callout against the specification sheet. Confirm the frame material, padding thickness, net type, and panel finishes. Ask where each material appears in the playground layout and design, and confirm that high-traffic zones use the specified grade. Vasia Play lists galvanized steel frames, composite boards, EPE foam, PVC and PU leather, and polyethylene components. Check that the drawings name these materials in the right places.
Safety surfacing needs its own review. Confirm the safety surfacing type, its depth, and its coverage under slides, climbing routes, and drop zones. ASTM and EN1176 both address impact attenuation, so match the surfacing spec to the fall heights shown on the drawings. Ask commercial playground equipment suppliers to state the surfacing responsibility in writing. Some suppliers include it, and some leave it to your contractor.
Finally, connect the material review back to safety. A correct material callout protects children and protects your warranty. Record every confirmed spec in your feedback list, and keep that list with the drawing set. The next review round will move faster when every requirement has a written answer.
Step 3: Verify Safety Documentation and Accessibility
Check Against Playground Safety Standards
Ask commercial playground equipment suppliers for safety paperwork before you compare prices, not after. A price does not mean much when you cannot confirm what supports it. Request the documents with the first quote, and read them before you rank any bid.
The Consumer Product Safety Commission (cpsc) guidance gives you a useful place to start. The CPSC Public Playground Safety Handbook explains fall and mechanical-injury concerns in everyday language. Use it to shape your questions about platform edges, entrapment gaps, and impact areas.
A certificate that names the standard helps only when it matches your equipment, your market, and the current revision.
Vasia Play states ASTM and EN1176 compliance and TUV certification since 2008. Ask for current documents that cover your exact project and jurisdiction. Check that the certificate lists the model family you ordered. Confirm the issue date and the standard revision. Then file the documents with your drawing set.
International play equipment manufacturers association (ipema) certification gives you a third-party check on ASTM F1487 compliance for the North American market. ASTM International F1487 sets the core performance standard for commercial playground equipment in the United States. Pair that with your local fire-exit rules and impact-protection codes. Together, these sources turn vague safety talk into a checklist you can verify line by line.
Confirm Accessibility and Use Zones
Accessibility belongs in the drawing review, not in a later talk. The Americans with Disabilities Act (ada) accessible routes require a clear path from the entrance to the play area. Check the route width, the surface, and the transfer points on the plan. Confirm that ramps and ground-level play parts appear where the design promises them.
Use zone dimensions deserve the same close look. Measure the clearance around every slide exit, swing, and climbing element against the standard you confirmed earlier. Confirm that safety surfacing covers each use zone at the depth the fall height requires. Mark any zone that crosses a column, a wall, or a walkway.
Supervision sightlines complete the picture. Stand at the parent seating area on the plan and trace what an adult can see. Blind corners behind play structures create risk, and they also weaken your staff’s ability to respond. Ask the supplier to adjust the layout when a sightline fails.
Record every finding against a drawing number and a part label. This habit keeps your safety and accessibility requirements visible through each review round. It also gives you a written record when you approve the final set. Strong standards compliance starts with questions you ask early and answers you keep on file.
Step 4: Confirm Site Details and Warranty by Component Category
Match Drawings to Site Conditions
Walk the real space with the drawings in hand before you finalize anything. Measure the ceiling clearance under every high platform and slide exit. Check column positions against the site plan, and make sure door widths and corridor turns let equipment sections reach the room. A detailed site plan marks each access route, so your installers know how panels and frames enter the building.
Installation notes belong on the drawings, not in a separate email. Confirm footings, floor fixings, drainage points, and ceiling clearance for each structure. State clearly who handles each item: your contractor, the supplier, or a shared scope. Vasia Play provides installation support, 3D and screw-level manuals, and remote video guidance, with the exact scope confirmed per order. Review 3d renderings against the measured plan one last time, then lock the specifications.
Review Installation and Warranty Terms
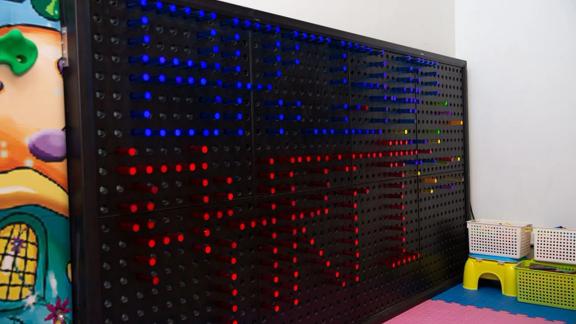
Read warranty terms by component before you sign. Frames, padding, nets, slides, and electronic parts wear at different rates, so each category may carry its own coverage period. This breakdown lets you compare commercial playground equipment suppliers on more than price. A low quote with thin padding coverage costs more over time than a fair quote with solid terms.
Ask each supplier to explain warranty by component category in writing. Match every category to the part labels on your approved drawings. Confirm what voids coverage, such as improper cleaning or unauthorized repairs. Vasia Play backs its commercial playground equipment with lifetime after-sales support, and the exact warranty terms by component are confirmed per order. File the terms beside the drawings, and check that accessible routes and safety details stay covered through the full warranty window.
Step 5: Document Feedback and Approve Final Drawings
Communicate Changes Clearly in Writing
Put all your comments into one written list before you send anything back. Link each item to a drawing number and a part label, so the supplier can find the exact spot without guessing. A message like “slide too short” invites a wrong fix. A message like “Drawing A-3, part S-12: confirm slide exit clearance” gets an answer you can check.
Number each item and ask the supplier to reply in the same order. This simple habit turns a scattered email thread into a record you can track. Keep one master list for the whole project, and mark each item open or closed. When a new round of drawings arrives, you can confirm every closed item and spot anything that slipped. Written feedback also protects you if a team member leaves the project mid-review.
Complete the Final Approval Check
Run one last check before you sign the set. Confirm that the approved drawing set matches the quote line by line. Check that the safety documentation covers the exact models shown on the drawings. Then lay the set over your site plan and verify every dimension, clearance, and access route against the measured space.
Walk through your original requirements one final time. Each one should have a visible answer on the approved sheets. If a requirement has no answer, hold the approval until it does. Sign and date the set only when all three documents agree: the quote, the safety documentation, and the site plan.
The approved drawings then become your shared reference. Installers build from them, spare parts get ordered against their part labels, and future maintenance checks follow their layout. File the signed set with the warranty terms and safety certificates. Every later question about safety or configuration starts from that one document.
You now have a cycle you can repeat: prepare, check, verify, confirm, document, and approve. Use it with every drawing revision. A written review done as a team protects your budget from change orders. It keeps your opening schedule on track and guards the safety of every child who plays in the finished space.
Treat the signed drawing set as your shared reference. Installers build from it, spare parts get ordered against its part labels, and future maintenance checks follow its layout. Ready to start your indoor project? Contact the Vasia Play team at huaxiatoys@huaxiatoys.com for floor-plan analysis, a 2D CAD layout, and a free 3D proposal.
FAQ
What should I send my supplier before drawings start?
Send a measured floor plan, usable ceiling height, column positions, entrances and exits, target age group, attraction mix, theme references, budget, and opening schedule. Add site photos and any building drawings you already have. When your site data is complete, the supplier can place equipment in the right spot and you will need fewer revision rounds later.
Who confirms which safety standards apply to my project?
You do. Confirm the rules for your destination market, then write them into the brief. ASTM and EN1176 cover spacing and structural concerns, and local fire-exit and impact-protection rules also apply. Ask the supplier to show each requirement on the drawings, and request current certificates for your exact models.
What if the drawings and the quote list different items?
Pause and fix it before you approve anything. Compare the equipment schedule, the drawings, and the commercial scope line by line. Price gaps often come from scope gaps, not quality. Ask the supplier to correct the documents so all three agree, then check the revised set again.
How should I handle a second round of drawings?
Reopen your master feedback list and confirm each closed item against the new sheets. Mark anything that slipped back to open. Check that new changes did not alter dimensions, clearances, or part labels you already approved. Reply in writing, tied to drawing numbers, so the record stays clear.
What happens after I sign the approved drawings?
The signed set becomes your shared reference. Installers build from it, spare parts get ordered against its part labels, and maintenance checks follow its layout. File it with the warranty terms and safety certificates. Every later question about configuration or safety starts from that one document.